25 years? Wowza!

I’m not one for celebrating milestones. I don’t even set goals. I just do the best I can each and every day. The satisfaction in providing top-notch service with astonishingly quick speed, in my opinion, far exceeds the accomplishment of any mundane goal.

Yet, the other day I realized that 2018 will mark the 25th year for ProGravix. It certainly took a lot of work, and a few sidesteps early on, but since 1993 we have been offering graphic design (and, much later, web design and video services) with passion.

As a boy, I loved basic programming on the family’s Commodore 64 (with a lot of game time, of course – Frogger and Rampage come to mind). I had always loved computers, but never felt that programming was all that satisfying. That was the early years of personal computers. At the start of high school, I took several courses of COBOL and Pascal (computer languages), which I never really understood (and always failed). As a sophomore, I came across a class called Desktop Presentations, where they used Macintosh computers to create graphics. During the same year, I was learning the process of photography and developing film. For a photography class assignment, I used the photos I had taken, along with the hardware and software provided in my Desktop Presentations class to complete an assignment. It was the first assignment where I had garnered an A grade while using a computer.

In 1993, I had just turned 17, and finished up my Junior year of high school. By this time, the family computer had been upgraded to a Macintosh Performa. I was creating flyers for events, and designing other printed materials for family and small businesses. I also established the name ProGravix, and registered the trade name and trademark with Arizona’s Secretary of State. ProGravix certainly was a part time endeavor, with school taking priority. It was to become ever more pushed to the side…

Later in that same year, I began working at AlphaGraphics as a graphic designer. I had yet to graduate high school, but was proficient enough with PageMaker and Macintosh computers to amaze the manager, who offered me a position on the spot. While I had never pursued higher education, AlphaGraphics taught me a great deal. I made connections in the printing industry, and was part of many large scale projects in the Phoenix area. The fast paced retail environment was a challenge, but the insight into business management and offset printing afforded me a wealth of experience and knowledge.

By 1996, I had become exhausted with AlphaGraphic’s retail environment, and sought a position with Maricopa County’s Library District as a Senior Graphic Designer. The drastic change from fast paced creativity, to bogged down governmental status quo was dramatic. It was a nice change, but certainly not challenging enough. Moving from high volume, full color offset printing, to black and white bookmarks for youth and adult services seemed to dull my creativity. During these years at Maricopa County, I continued to pursue projects on the side – creating banners, menus, anything where my creativity could explode. During this time, I also became well versed in HTML, and the art of web development, having taught myself by reading the code of many popular websites. Although I was a vital component of the Library District, I worked closely with other departments such as Animal Control, Department of Transportation, Parks and Recreation, and the Stadium District, which oversaw the completion of Bank One Ballpark (now Chase Field). I was the go-to photographer and graphic designer for these departments – mirroring my sophomore year of high school.

In 1998, I chose to end my employment with Maricopa County, and begin an all-in effort to grow ProGravix. I had established many clients, and grew ever more knowledgeable about web development. This year also marked the beginning of ProGravix’s online presence.

In 2001, we became heavily invested in expanding the video services portion of our business, serving mainly as wedding videographers. From 2001 to 2005, we had created hundreds of wedding, graduation, genealogy, and remembrance videos. When the decline of the economy drastically curbed this service, we started to focus on very high end video projects for individuals or commercial endeavors.

Now, having achieved this 25 year milestone, I can assure you there is a lot more to come. ProGravix continues to grow, year after year. This is not achieved by advertising. We garner our business through our clients. By choosing to provide top-notch service day after day, we are choosing our quality and speed of service to speak for itself. Our clients share that with other potential clients, who begin to understand very quickly who we are, and what we do.

This has been today’s Clarified Butter.

Wrangle pesky “newer version” errors in Illustrator

From time to time I receive an AI or EPS file from a client that just won’t open – either at all, or not cleanly. The reason given is usually of the “newer version” nature. The error is typically…

There is an easy solution – given you are running a Mac. There is a neat little application that I use a lot – Preview – which most of us pass off as Apple’s free PDF reader. But it can do so much more.

The solution to this “newer version” issue is to open the AI or EPS file in Preview. To do this, right-click (or control-click) on the offending file and choose “Open With > Preview.” This will work for virtually all EPS files, and most AI files that were saved with PDF compatibility. The file is opened in a new untitled Preview window. Go to “File > Save As…” and save it as a PDF file and close the Preview window. Now, right-click (or control-click) on your new PDF file and choose “Open With > Illustrator.”

Your resulting file will typically be locked together in a clipping mask, but this can easily be released and then fully edited or manipulated.

While you are in Preview, look at its other cool features, such as…

  • Combining multiple PDFs into a single file
  • Saving PDF files in other graphics formats, such as JPG, TIF, etc.
  • Encrypting existing PDF files with password protection
  • Decreasing PDF file sizes by reducing image quality
  • And so much more…

This has been today’s Clarified Butter.

WTF: What the font?

I tend to think that I have a great photographic memory when it comes to font recognition. There has to be billions (if not trillions) of fonts from thousands of foundries and individual designers. Even with such a great pool to pull from, it always seems that a small set of fonts get all the love. Not so sure what that says about my memory now.

Serif fonts are a bit easier to match – given they have a bit more of a distinguishing appearance. Sans serif fonts can be much more difficult to match, especially if you have a small set to match from.

Additionally, designers take liberties when using fonts in logos, manipulating characters to match a certain style, or to provide uniqueness. This makes it difficult to match the fonts, but there are a few tricks.

Your first step is to try an online tool to find the font. You just might be lucky enough to find a free option. These tools allow you to provide an image (either by upload or URL), to which the server scans their database of fonts to match against. This works great for images that meet certain criteria (such as resolution, space between characters, orientation, etc). I prefer MyFonts’ WhatTheFont. Their results are impressive, and show both free and pay options (with direct options to download and/or purchase those fonts).

A recent project had me stumped. I had tried to match the font from the native logo artwork, but nothing was coming up. I then realized that the original designer must have modified certain letters.

Cassandra Font

Luckily the logo was provided to me in vector (Illustrator) format. I opened the file and modified the letters which appeared to be customized (those where a separation had been added at certain points). As soon as I did that, I had a perfect hit for Cassandra XBold – a free font.

This has been today’s Clarified Butter.

Who do you recommend?

Creating a unique and eye-catching design for your print work is only part of the overall project. We’re constantly asked who we recommend when it comes to offset printing. In this digital age, you would assume that the need for physical materials would be diminishing. Nothing could be further from the truth.

A typical “branding” piece that is created after the development of a business identity and logo design is business cards. A business card is an affordable way to get the word out about your business. The quality of this card should reflect the service or products you offer. If your card looks cheap, so does your company. It’s important to choose the right printer – this is not a time to skimp. That’s not to say that it’s going to break the bank… just don’t choose the first “good deal” or “free” offer you see. For just a little bit more you can have amazing business cards.

Business Cards

For business cards, and any other full color printing, I recommend PrintRunner. They are based out of California, and offer incredible prices for immaculate quality. Of special note is the 14pt UV Coated or 14pt Gloss (AQ) Coated stock. Either of these options will provide a shiny, glass like surface – which will really make your colors pop. Of course they offer the typical Matte or Recycled paper options, which are great when you are trying to promote an earthy, “go green” feel.

I’ve used PrintRunner for postcards, business cards, letterhead, catalogs, banners, trade show booths – pretty much everything. We are not affiliated with PrintRunner, and make no profit for referring them. They are just that good.

So, when you are ready to get some physical materials printed – let us help design… then let us help you get it on over to PrintRunner. You’ll be happy you did.

This has been today’s Clarified Butter.

Photograph vs Picture

iPhoto IconIt seems like I use the terms photograph and picture interchangeably, and with little thought. Today I was really pondering the difference between these words, and whether there is a simple explanation between the two, or if it’s much deeper… much like the difference between house and home.

Technically, a photograph is “an image created by light falling on a light-sensitive surface, usually photographic film or an electronic image such as a CCD or a CMOS chip.” We usually associate photograph creation with cameras, either analog film or digital files. But using the above Wiki definition extends beyond cameras. Can we not also take photos with our light-sensitive eyes (and minds)? What if a very skilled individual created an extremely realistic digital illustration? Would we call that a photo or a picture? I would assume we could only go off the information we were given. I would call that a picture – knowing that the original creator drew it. Consumers would likely interpret it as a photo.

Beyond that, does the quality or content of the image allow us more freedom in our use of photo or picture? To me, where actual photographs are involved, it seems like I tend to use photo for high-end images, or images where the content is extremely rich, and picture for images that are so-so, or don’t really deserve the term photo. That may seem strange, but it’s almost like I am putting photo on a higher level than picture. Am I crazy, or are others doing that as well?

And while we’re at it, let me touch on another (possibly sensitive) subject. A camera does not make a photographer – at least a good one. A really great photographer is capturing photographs, while everybody else is taking pictures. Maybe this is the root of my photo vs picture conundrum. I dunno. Don’t kill me.

This has been today’s Clarified Butter.

Paper or plastic?

Would you like paper or plastic? I haven’t heard that it years, although my wife swears that her grandmother asks for paper in plastic. I didn’t even know that grocery stores still offered paper. But to actually request both? Take that environment!

To be honest, I have nothing against the environment. I go paperless as often as I can. Well, except in one area.

The newspaper.

I receive the local paper, The Arizona Republic, daily. The so called “Monday to Sunday” subscription. For years I have paid roughly $10 per month to receive the paper, each morning. To their credit it has always been on-time, and for the most part damage free. A few months ago they decided to change their subscription model to an “all you can eat plan,” combining their daily print edition with full online access. In theory, this is great, but here is the problem: it costs over twice as much. Prior to this change, their website, AZCentral.com, was completely free. I never used their site. It was cluttered, jammed full of ads, and was incredibly slow. Their alternative is a $10 per month online-only plan, with all the same flaws I’ve already shared. Great you think, right? Mr. Techie here should love consuming and digesting his local news from the vast interwebs. Not so…

The reality is that I just don’t like getting my local news from an online source. I don’t know what it is, but I just like the feel of holding newsprint in my hands. I enjoy eating breakfast with the morning paper sprawled out across the table, carefully deciding what to read based on the headlines.

Every print addition makes special note to call attention to print readers enabling their online access, promising an “exact digital replica.” I’ve tried this so called replica, but it’s just not the same. Something about walking out barefoot on the cool driveway, picking up the slightly dewey paper, snapping off the rubber band, and griming up your fingers with soy ink just can’t be replicated digitally. Well, until there is an app for that.

What’s more strange is that I have changed magazine subscriptions to digital, and it feels no different to me. I subscribe to computer magazines, and I do enjoy consuming techie news and rumors online, so maybe that has something to do with it.

Overall, I don’t think it’s fair that I must now pay over twice as much to receive the same exact thing that I’ve always had. Especially seeing as how the newspaper is already 65% advertisements. I no longer subscribe to cable or satellite television service. Mostly because I can’t stand paying for 100’s of channels I don’t enjoy, but moreover, all of the advertisements that I am paying to watch. Something about that just isn’t right. Maybe I should use that same logic in my reading habits.

This has been today’s Clarified Butter.

PDF Compression: Use it wisely

Nothing aggravates me more than individuals or organization sending out (or making available) important information in a Word file. How difficult is it to create a small, widely supported, open-source PDF? Not difficult at all.

Just below that level of aggravation is another matter spawned from a similar lack of detail. File compression. You know, making files much smaller than they really need to be. We all consume compressed music, videos and photos. Why not add PDF to that list? ProGravix delivers artwork in compressed ZIP archives, and we always create media consumed by our client’s customers in a perfectly compressed format.

The best place to implement compression is within our PDF files. Certainly we want to create high resolution artwork (for those times that the printer prefers PDF). But when it comes to making brochures, sales sheets, manuals, et cetera available on our websites, what’s the point in posting that huge 250MB file? The chance that they are going to print it is very slim, so creating a low resolution file that’s great for online viewing is what we need.

There are several levels of PDF compression. By default, a high resolution PDF (preferred by printers) contains 300dpi images and uncompressed text and vector elements. These types of files are extremely bloated, resulting in very long load times – which is fine when you are sending art to a printer… it only needs to be uploaded and downloaded once.

Adobe has developed several compression presets. The two I most widely use are High Quality and Smallest File Size. High Quality is great for creating artwork or high res proofs. Smallest File Size is great when you need to make files available on a website for download. The downside to the Smallest File Size preset is very low image quality. All images are reduced to 72dpi, with a very high JPG compression. I think the best option is the sweet spot between these two presets.

When creating a web-ready PDF file, where images need to be slightly better than web quality, I choose the High Quality preset, and modify the compression settings. Set Color Bitmap Images and Grayscale Bitmap Images to 150ppi. Also make sure that Compress Text and Line Art is checked. You can also choose to lower the ppi for Monochrome Bitmap Images as well (if your document contains them).

I usually keep JPG Compression to Automatic, but you can test your results, and choose a compression that suits your needs.

Overall, we need to be mindful of our visitors time. We need to allow them easy access to our information, at a reasonable speed.

This has been today’s Clarified Butter.

Understanding and creating your own barcodes

We’re all familiar with them, but do we understand what information they hold, and how to create them? Probably not. We just know that when the cashier scans them, the register beeps and we’ve spent some money.

We create a lot of retail packaging, and a vital part of that packaging is having a valid UPC symbol. UPC symbols are generated from two bits of information, your company prefix, and the product number. The last number, the check digit, is automatically calculated based on the previous 11 numbers.

Above we can see an example of a UPC symbol with a 6-digit company prefix. The first six digits are assigned by GS1-US (a governing agency for the assignment of manufacturing codes). The next five digits are the product code, which is assigned by the manufacturer. And again, the last digit is a check digit based on a calculation of all of the other numbers (which I won’t go into here, since there are tools that do the math for us).

It’s important to note that you cannot simply create your own company prefix, and resulting UPC symbols, without first obtaining one from GS1-US. This is so you don’t accidentally use a number that already exists, which would really cause problems for retailers.

In a past post, I explained QR codes, which have quickly become popular. These QR codes can be generated by anybody, and do not require any assigning agency or government oversight. In addition to QR codes, there are hundreds of other barcodes that various businesses use internally to help streamline their processes. ITF-14 is a good example. I use ITF-14 as SKU numbers for pallets and multiple-unit cases. These ITF-14 numbers are also assigned by GS1, and are used to encode a Global Trade Item Number.

So, now that we know what these barcodes are, how do we create them? For years, I had been receiving physical artwork for UPC symbols from clients. Obviously this is a pain, requiring that I scan the barcode in, and if you have been reading this blog, that doesn’t provide me with a vector version I so desperately desire.

Recently, I’ve been using a neat little tool I found called the Online Barcode Generator. This no-frills generator is extremely powerful. It allows for the creation of hundreds of different types of barcodes, automatically calculating that check digit, if needed. It provides the resulting barcode in PNG, JPG, and yes, EPS format. I obviously opt for the EPS format. It quickly opens in Illustrator. The barcode lines are strokes, and numbers are actual text (Helvetica), so I quickly outline the strokes and fonts to alleviate any scaling issues.

So, there you have it. Barcodes and how to create them. Go barcode crazy!

This has been today’s Clarified Butter.

Press ready art: general guidelines

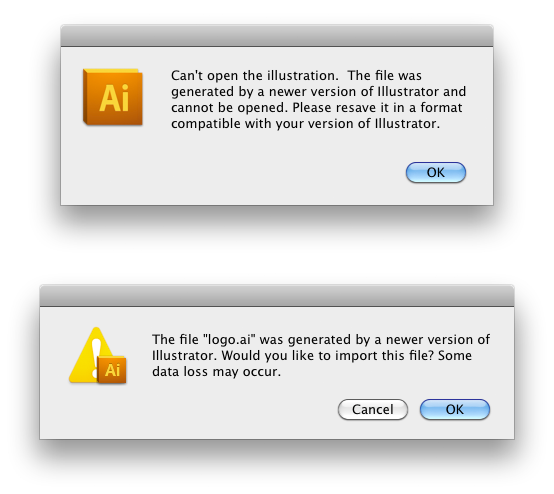
Over a decade ago we used to prepare files for film producers, to create negatives from which metal plates were made for the purposes of offset printing. Long gone are the days of right-reading, emulsion-up, negative specs (at least for us). I remember dropping off a ZIP disk (remember those?) to a service bureau, having the receiver tell me that my files were always perfect. She explained that I always provided the necessary fonts, embedded images, and such. This resulting in a much faster turnaround time.

Nowadays, practically everything is digital, from design to press. This helps smooth out pre-flight issues, but there are still some general rules that you must follow in order to meet a print shop’s requirements. A lot of press houses provide templates and specific guidelines for their purposes, but in general, these will help you avoid any hiccups.

Bleeds
A bleed is the extra artwork that extends past the trim mark. In general, a 1/8″ bleed is sufficient. Some printers request 1/4″, but that is typically reserved for larger booklets or manuals.

Trim marks
Trim marks (also referred to as crop marks or registration marks) are those guides at each corner of the printed piece that show the final cut size. In full color printing, these help with registration, showing that all colors are being printed perfectly in sync.

Resolution
In general, raster artwork should be developed at 300dpi. Some large scale items such as trade show booths and banners can be developed at 150dpi, but I recommend checking with the manufacturer of those items. Artwork developed in Illustrator in usually resolution independent. However, raster items, such as drop shadows, should be set at 300dpi.

Outline text or provide fonts
To resolve any font issues that may arise, convert all text to outlines. In applications that do not support this, make sure to provide all fonts used in the piece. In general, a PDF Press Ready file will include the fonts, but some fonts have licensing restrictions, and cannot be embedded in PDF files.

CMYK
Unless otherwise directed by the printer, your artwork should be in the CMYK color space. Most full color artwork is printed on a four color offset press. Make sure your artwork is in CMYK mode from the very beginning. Transitioning from RGB halfway through a project’s development can produce unwanted color issues.

File format
The industry standard artwork format is PDF Press Ready. Again, you should check with your printer, but the PDF format is widely supported across all platforms. For the most part, what you see is what they will see, but again, it’s not foolproof. If you have a very complex file, I recommend converting it to raster, providing the file in TIFF format.

This is just a few general guidelines. Again, check with your printer. In most cases, we don’t know who the printer is until we are asked to provide artwork. In can be difficult to go back and implement some of these tips, so keep them in mind.

This has been today’s Clarified Butter.

Create the perfect cover photo for Facebook’s new Timeline layout

Regardless of whether you like it or not, everybody will eventually have the new Timeline layout for their Facebook profile or page. I personally like it. I think the layout is cleaner, and provides more flexibility when it comes to customization.

A major part of the new layout is the Cover photo, which is the large image that encompasses the top 315 pixels of your profile/page (excluding the Facebook bar across the top). Choosing what to place here is much more than choosing a photo from your existing albums, or uploading a plain photo. The key is developing an image that better explains yourself or your business.

Choosing what to design can vary widely, but should be focused on what you want to emphasize or portray about yourself or business. For a Business Page, you might want to include a series of photos that relate to the products or services that you offer. Here at ProGravix, we chose to use an image that mimics the look and feel of our website, which currently emphasizes our mantra, Simplify Chaos.

To get started, fire up your favorite graphics application. We chose Photoshop CS5. Create a new document with a size of 850x315px.

What you do next is up to you. Be creative! Can’t? Well, that’s where we can help. If you need assistance in developing a cover photo, please contact us. You’ll be glad you did.

When designing, make sure not to place any important content, such as text, where the profile photo is, which is on the bottom left of the cover photo. Any content placed here in the cover photo will be covered up by the logo.

Whatever you design, make a statement with your cover photo. Just because it’s a static image doesn’t mean it should be plain. As always, keep it simple and clean!

This has been today’s Clarified Butter.