Update: Amazon’s Fire TV

Three years ago I wrote a post about watching local content on Amazon’s Fire TV via Plex. At that time, we watched content via Mac minis connected to LED TVs. The main problem with this approach was the accessibility to online services such as Amazon Prime Video and Netflix. You had to wrangle a keyboard and mouse from the couch, and that was just cumbersome (and not kid-friendly).

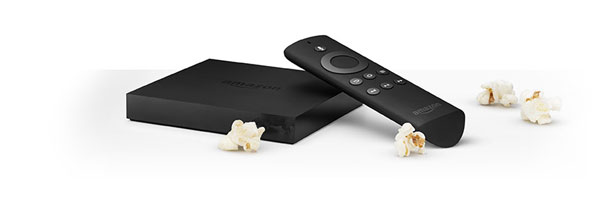
I expressed my desire in that post for Amazon to release a stick version of their Fire TV, similar to Roku’s Streaming Stick. I had tried out Roku’s stick, and didn’t like it much. Well, they did eventually release a Fire TV Stick, but I opted to purchase the full boxes instead.

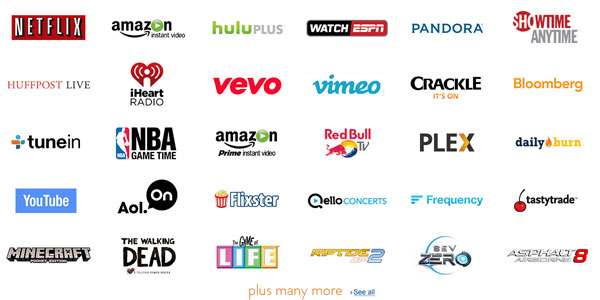
Since that post, we have converted to watching content via Fire TVs connected to those same LED TVs. We still have those Mac minis connected (although they mainly serve their purpose as Plex Media Servers and OTA DVRs). These Fire TV boxes are great, and fairly stable. We mainly watch Plex content on them, but they are also an easy way to consume Amazon’s video and music library, while also providing easy access to YouTube (a service I thoroughly enjoy watching vlogs [and the occasional fail compilation] on).

Since purchasing those Fire TVs, we delve even deeper into the Amazon ecosystem and purchased Fire tablets for the boys. I was hesitant to adopt the Android platform (being so firmly in the iOS camp), but it works great for the boys (who also have their own iOS devices to keep them grounded in truth). Don’t get me wrong, I will always be loyal to iOS, and I would never buy an Android phone. But for cheap tablets, these things are great.

This has been today’s Clarified Butter.

Watch your local content on Amazon Fire TV

A few days ago Amazon released their offering in the streaming box arena (what is sometimes referred to as a set-top box). It’s called Fire TV, and it’s creating quite the buzz.

Fire TV

The competition is fierce in this area, with solutions from Apple, Roku and Google already established as the go-to guys. At $99, the price matches Apple TV and Roku 3, and to be honest we really can’t compare it to Google’s Chromecast at $35. Not a cost comparison, but the lack of Chromecast’s features.

But to me, the game changer here is Fire TV’s support for existing Android apps (from Amazon), and most importantly, Plex, which is supported right out of the gate. Apple TV has no officially supported Plex client, and Roku’s UI gives me a splitting headache. The Plex client for Fire TV is Plex for Android, and it’s already been around for a while, and the UI is excellent. Not Plex Home Theater excellent, mind you, but better than Roku.

fire_tv_apps

For a while, Roku has been the easiest (and cheapest) way to get Plex on your TV. I purchased Rokus for my father and father-in-law, which allows them to see the content I share with them via Plex. I still prefer to run Mac minis on my TVs, but I am seriously considering this Fire TV as a future Plex client when my minis can’t cut it anymore (seeing as how they are pushing 5 years old).

The majority of 1-2 star reviews for Fire TV complain that you cannot access your local media (via DLNA or otherwise). I would imagine that the vast majority of Fire TV users are obtaining their content from providers like Netflix, Amazon Instant Video, Crackle, etc. But, for those individuals that have local content, Plex is the answer. All it requires is that you install Plex Media Server (free) on your supported Mac, Windows, or NAS device, and purchase the Plex for Android app for the Fire TV. Once you setup Plex Media Server with all of your media, it presents itself beautifully on the Fire TV Plex for Android app.

Now, if I can gripe for just a moment here.

I recently tried out the Roku Streaming Stick. It’s a great little device, but again, the interface is horrible. Netflix looks pretty good on it, but that’s about it. Amazon Instant Video and Plex channels share the same common look and feel. It’s difficult to browse content, and it’s plainly not fun to use.

The positive, however, is that it’s a stick. It plugs right into your HDMI port, with the power being drawn from the TV’s USB port. If your TV doesn’t have a USB port, you can plug it into a regular power outlet with the included adapter. I would love to see a similar solution from Amazon. I’m all about less clutter. If I can have a TV hanging on the wall with no devices dangling from it, or power cords junking up my living room, I’m a happy camper. I’d be fine with giving up ethernet, optical audio and USB if I could have a Fire TV stick.

All this being said, I’m going to hold off a bit longer to see what Apple’s answer will be. If they release an Apple TV stick that supports iOS apps (including Plex), with a remote and game control via iOS devices… that… that would be awesome.

This has been today’s Clarified Butter.

Achieve best results from iMovie to iDVD

My main concern with iMovie ’08 several years ago was the complete removal of easily creating a DVD from within iMovie (via iDVD). Certainly this was addressed via the followup ’09 release of iMovie, but an issue still remained, and still remains today. iMovie uses single-field processing. This means that every other horizontal line of the video is thrown out, which reduces the sharpness of the footage. This quality loss is exaggerated when attempting to export to DVD, which is interlaced video.

I won’t go into the difference here between interlaced and progressive. I’ll assume that by now you’ve heard this 1000 times, with all the 480i, 720p, 1080i, 1080p jargon.

The simple fact is that the loss of that dropped second field really causes problems with DVD, which is 480i. Throw in an upscaling DVD player that exports at 1080p, and you’ll have a hot mess.

Luckily, there is a way to achieve the best results you can. Certainly the best way is to use a version of iMovie prior to iMovie ’08, such as iMovie 6 HD. Unfortunately, this really limits your editing abilities afforded by using a newer version of iMovie.

So, assuming that you’ll be using the newest version of iMovie and iDVD, the method of importing and editing your video remains the same. The quality retention (at least the best it can be), is handled when the video is complete, and being exported to iDVD. You’d think that using the Share > iDVD menu item would give you the best possible quality. This isn’t so. The trick is using Share > Export using QuickTime…

Once the dialog appears, choose Export: Movie to QuickTime Movie and click on Options…

Make sure both Video and Sound are checked. Then click on Video Settings.

For Compressions Type, choose Apple Intermediate Codec, Frame Rate: Current, Data Rate: Automatic. Under Compressor, choose Other, check Interlaced, Top Field First. Click OK.

Next, click on Video Size. Choose Dimensions: 1280×720 HD. Make sure Deinterlace Source Video is unchecked. Click OK.

Next, click on Sound Settings. Make the settings match what is shown below. The sound settings here do not affect the quality of the video. You can adjust these as needed. Click OK.

Name your video file and click save. A special note here is that this will create a very large file: a rate of about 20GB per hour. Remembering that iDVD will need hard drive space that is double the final size of the DVD, you’ll need to make sure you have the resources.

The resulting video quality won’t be 1080p HD quality, but it certainly will look a lot better than using the Share > iDVD method. Your video and titling will appear with much less jaggedness. Certainly not super-crisp, but much better than the progressive version that iMovie would otherwise export.

Apple would like us to believe that physical media like DVDs are dead, but there still is a need for it.

While we’re covering iMovie and iDVD: I almost always provide an HD digital copy on the DVD-ROM portion of the DVD. This allows the recipient to have an ultimate quality version for their local media library, smartphone, iPad, or other digital device. I export using an MP4 container and the H.264 codec to provide maximum compatibility.

This has been today’s Clarified Butter.

First impressions: the DVD packaging

I think we have a unique situation here at ProGravix. Seeing as how we are graphic designers and web developers, we have an advantage over other videographers that don’t share this same skill set. First, and foremost, we are graphic designers. This bleeds over into web development. But how can it help with videos we create? Tons. Certainly the actual capture, editing, and display of that video is a substantial part of the project. But I think making an impact with the packaging is extremely important. As graphic designers, we use our expertise to create engaging, studio quality DVD cases and faces that invite the viewer in, and give an impression that what they are about to watch is an important keepsake.

Providing a physical package that you can touch, feel, and see grabs the customer, and potential customer. It tells them that what they hold in their hands is a one-of-a-kind heirloom. A polished, personal project that can be presented in their home for anyone to see, without the need to watch.

I’ve seen other videographers write the name of the client or project on the face of the DVD with a marker, or drop it in a DVD sleeve along with a business card. I think it’s important to let your customer know that you were fully invested in their project. You used every ounce of creativity you had to create something that you are personally impressed with.

Aside from wedding videos, a lot of videos we create are gifts. It’s important that the gift be something impactful when presented or opened. You want the recipient to be excited about that gift, without the need to immediately watch it. You want the packaging to entice the receiver to want to watch it.

So, please videographers, put down the marker and make a presentation with your video and packaging. If you don’t know how, let us know, we’ll be happy to help out.

This has been today’s Clarified Butter.

Organize and archive your workflow

When I first started in graphic design, back before CD burners and cheap platter storage, we used 3.5″ floppy disks to store customer’s digital artwork. We had a rack on the wall that held several hundred disks, all labeled and marked with numbers. Those numbers correlated with a database stored on the computer which listed what each disk held. It was quite cumbersome, but really all that was affordably available at that time.

Over the years we moved to larger tape drives, zip drives, flash, and so on, until we eventually came to DVDs and hard drives. We’re at the point now where regular consumers can have terabytes of storage, locally or on their network. And at prices that are remarkably cheap.

I’m very picky in the way I organize my files. All of my personal projects have their own folder. Business files have their own folder. Current websites have their own folder, as does current design and current video project. All websites are organized by domain, and all design projects are organized by client name. Any web sites or clients that are considered ‘dormant’ are moved to ‘archive’ folders. These archived folders are then moved onto DVDs for permanent backup. I should also point out, during all of this time, all files on every computer on our network are backed up in three places (delta, every hour), automatically. So, if a drive or DVD were to go bad, we could always find a replacement somewhere.

Now, when it comes to naming your files, be specific. I had someone chuckle when I used the accent marks on résumé instead of just typing resume. I had to explain that résumé (that important piece of paper you provide with a job application) and resume (starting a process which had been paused) are different. If I wanted to search my computer to find a résumé, it would be much quicker as all instances of resume would be removed.

Also, if you don’t know which project a piece is attached to, ask! It’s better to be organized when they come back 2 years down the road and want to make a change to the flow chart for the XYZ project. If you had simply named it ‘flow_chart_32’, it’s going to be a lot more difficult to find. Store it in a folder named ‘XYZ’ inside the client’s folder. This might seem overly simplistic, but I’ve worked with individuals that were very sloppy, and stored practically everything on their desktop. I’m not saying that’s bad, but ProGravix doesn’t allow it.

This has been today’s Clarified Butter.

Aspect Ratios: Photo vs Video

A major part of creating custom video keepsakes for customers is manipulating their content, specifically their photos, video, and audio. Video can be tricky on it’s own, given the number of different formats. Music can come as cartridges, tapes, CD or digital copies. Today, however, I would like to discuss photos, which we receive in digital or physical form. About 80% of the time, they are physical, hard copies. Many videographers use video equipment to capture the photos, using small sections of film to create video clips. Instead, I prefer to actually scan the photos at an optimized resolution, which provides the best possible quality. And since they are now digital files, the customer can store them along with their newer digital photos (which we provide on the DVD-ROM).

The point of this post is to discuss the resolution at which those photos should be scanned. When I ask customers to provide photos, which were originally digital, or prefer to scan themselves, I specify a size no smaller than 1280px at 72dpi (meaning that no side should be any smaller than 1280px). The reasoning here is that I am trying to optimize the photos for 720p HD resolution. But what does that mean? 720 refers to the number of lines of vertical pixels, while ‘p’ refers to Progressive Scan (something I won’t go into here).

So why 1280 if you want 720? Because most newer televisions, and ones that support at least 720p, have a wide aspect ratio (16:9), compared to older televisions that were more square with a 4:3 aspect ratio. If you had a 72dpi photo which was 720px high, to fully fill the 720p resolution, you would need a width of 1280px. Regardless of whether that photo is portrait or landscape, I want a width of no less than 1280px, and a height no less than 720px.

Given that the most common aspect ratio in still photography is 4:3, you will notice that a fair amount of your photographs will need to be adjusted to fit 16:9. I personally prefer to fill the entire screen, so I choose to enlarge, then crop the photos to fit. Most portrait photos will lose tops and bottoms, but with the use of panning and scanning (a la Ken Burns), we can dramatically present that photo, retaining most of the original photographers focus.

720p to 480p
Standard DVD resolution (read NOT Blu-Ray) is 480p. Yes, I understand that I am overshooting my resolution here, but given that I provide a digital copy with most videos, I might as well go all out (well, at least the lower levels of HD). I personally keep all of my home videos in digital format on an HTPC, so viewing HD content does not require Blu-Ray. I stream it directly from within my network. I envision that others might have this capability as well, and provide this digital copy with not much further effort.

This has been today’s Clarified Butter.