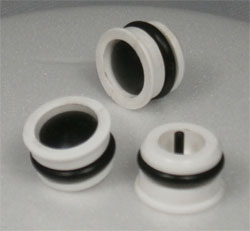
Image mask, applied to digital images to “cut-out” the background or other unwanted features, created by using clipping paths.
Thanks Wikipedia!
Now, why do we need to mask? Quite simply to make subjects appear cleaner or to use them on backgrounds for which they were not intended. I mask a lot of product photos. Often the background of these photos is not the best. Poor lighting, odd placement and other quirks lead to an useable photo. Luckily, we can mask all of that unwanted ugliness, and be left with an image perfect for an online store.
When I first started my career in graphic arts, I was trained in the techniques of paste up. That is, physically cutting and altering artwork to fit your needs. I guess it was needed for all of that old hardcopy artwork that was lying around that never made its way to the computer. Beyond becoming proficient with an X-Acto knife (to the point where I prefer it over scissors), I saw little to no benefit from it.
I guess it could be said that the training did benefit me in the skills of digital image masking. It’s not quite different… you just happen to be using a mouse instead of a knife and glue.
So how do I mask? I’m not sure how others do it, but I have a preferred method that produces remarkable results. With a mix of Photoshop and Illustrator, you can create masked images that dazzle your clients.
For the purposes of this tutorial, our desired result is a transparent background. This is beneficial in both online and print materials. If a client sends me artwork in high resolution, I will keep the image’s original size, and mask to transparent backgrounds. This saves me from having to re-mask if the client wants to use that image in future print materials.
 Step 1: Get your image ready.
After receiving the image from the client, open it in Photoshop to verify resolution. If the image is high res, but set to 72dpi, set the resolution at 300dpi at the same pixel dimensions. Select the entire canvas and cut, then paste. This will create a new layer with your image. Delete the Background layer. Save your image as a Photoshop file with layers.
Step 2: Fire up Illustrator
Create a new Illustrator document that is larger than your image. Place your image onto the page. Set your zoom level to 300%, choose your path tool, and set the border and background colors to none.
 Step 3: Create your clipping path
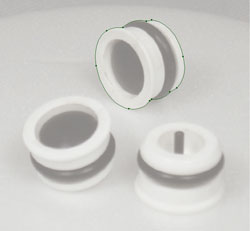
Using the path tool, outline the part of the image you want to keep. Make sure to stay very close to the edges of the piece you are masking, removing any shadows that might be present from bad lighting. After you have outlined all parts of the image you want to keep, set the fill the white with no stroke. Also create a small white box, with no stroke and align it at the top left corner. Select your paths and the small white box and copy that to the clipboard. Note: I have increased the transparency of the image to better show the clipping mask.
 Step 4: Get back into Photoshop
Open the same Photoshop file (the one you placed into Illustrator) in Photoshop. Paste your clipping paths from Illustrator, creating a new layer. They will be pasted centered in the canvas area. Using the white box in the top left corner, move the layer so that the white outlines snap to that top left corner, perfectly covering what you want to keep.
Step 5: Select Inverse
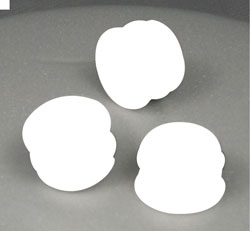
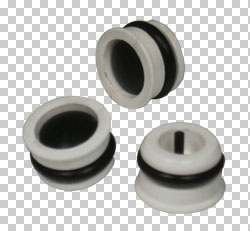
Select and delete the white box in the top left corner, it has served its purpose. Select the entire canvas and hit your up then down arrow on the keyboard. This will make a selection of just the white areas. Choose Select > Inverse. Go to your Layers palette and choose the original image layer and hit the delete key. Choose the clipping path layer, and delete that layer. What you are left with is a perfectly masked image with a transparent background.
 Now you can do whatever you want with that image. You can place it on a different background, collage it with other products, or apply image effects such as drop shadow. There is no limit to the possibilities.
So there you have it, what I consider the easiest, cleanest, fastest way to mask a product image.
This has been today’s Clarified Butter.
