Make and receive calls with an iPod touch

I’ve been part of the growing mass that has dropped their landline in favor of a mobile-only phone connection. I’ve been, officially, without a landline for six years. The seven years prior to that a landline was primarily used for fax and dial-up.

I’m hardly ever on my cell phone. I much prefer communicating via email. It provides all information I need in a readable form, that I can organize, and easily access if needed. There are times, however, when a phone call is required, and I’m sure we’ve all experienced those overage charges that can really cut into your profits.

So how do I alleviate my mobile overage problem? I make outbound calls on my iPod touch via a wifi connection. I’ve been doing this for a while, but have really been pushing it lately since my cell phone use has dramatically increased.
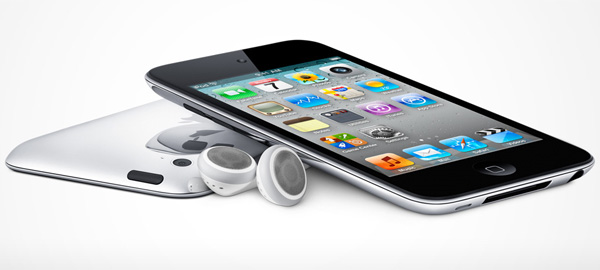
Here is what you’ll need to use your iPod touch as a phone:

Google Voice
Before Google acquired this technology it was called GrandCentral. I had a GrandCental account, and was part of the invited group to move over to Google. In the beginnings of Google Voice you had to be invited to participate. Fortunately my invite came via the acquisition process.

To get a Google Voice account you will need a Google Account. For most, this means having a Gmail account, but you can have a Google Account and not use the Gmail service. I will say, however, that to fully utilize your iPod touch as a phone, you will need a Gmail account and Google Account. The reason is that we need to access Google chat, which is part of Gmail. I won’t go into the specifics here, as it seems fairly straight forward, but make sure you have both a Google Account (using the @gmail.com address) and a Gmail account.

When you first setup a Google Voice account you are asked to choose a phone number. You specify a city or area code, then they provide a list to choose from. Choose your number and setup your account.

Talkatone
Install Talkatone from the App Store. When you launch the Talkatone app the first time, you will be prompted to enter your Gmail email address and password. Make sure to use the Gmail account you used to setup Google Voice. Talkatone doesn’t require a special account. Instead it uses your Google Account to connect to Google services.
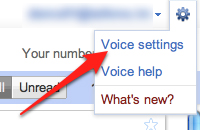
Login to your Google Voice account, go to Voice settings (access them via the little gear in the top right of the browser window). On the ‘Phones’ tab, check the box next to Google chat. Make sure to log out of all Google services, including Voice and Gmail.
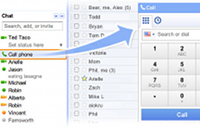
Now, go to www.gmail.com and login using the Google Account/Gmail account you used to signup for Google Voice. Find your contact list and click on the Call Phone action at the lower left section of the page. Make one call with the phone widget in GMail to your regular phone number. This step allows Talkatone to access the service, telling both Talkatone and Google that you’ve successfully setup Google Voice.

Finally, make sure to sign out of all Google services, including Voice, Gmail, and GTalk. If you don’t, calls made to your new Google Voice number will be forwarded to Gmail/GTalk and your iPod touch will not ring.

Come back to the Talkatone app and tap the ‘I did make a call from GMail web chat’. That way Talkatone will know that you successfully setup Google services.

You can now make and receive calls via Talkatone on your iPod Touch. Use the keypad to dial numbers direct, or use your Contact list. Get comfortable with Talkatone and visit the Settings tab. Make preferential selections for Notifications and Sounds.

And to clarify, you must have Talkatone open in order to receive calls. It’s not important that it be active, only that it be open and in suspended mode (aka multitasking). You can quietly keep it open while you use other apps on the device. When a call comes in, you will be notified (if you’ve setup your notifications as such).

I’d also like to say that while Talkatone supports SMS via Google Voice, I much prefer the Google Voice app for my texting. This didn’t use to be the case, but since Google Voice added landscape support, I’m sold on their app.

This has been today’s Clarified Butter.

QR Codes: What the heck?

We’ve all seen them, and they’re becoming more heavily integrated into print with the prolific infiltration of smartphones and other mobile devices. But what is it, and how can it be used?

A QR code (abbreviated from Quick Response code) is a type of matrix barcode (or two-dimensional code) first designed for the automotive industry. More recently, the system has become popular outside of industry due to its fast readability and comparatively large storage capacity. The code consists of black modules arranged in a square pattern on a white background. The information encoded can be made up of any kind of data (e.g. binary, alphanumeric, or Kanji symbols).

Thanks again, Wikipedia!

QR codes are typically scanned by smartphones (or other mobile devices such as iPod touch) to direct the reader to a website or perform some other task more easily. For example, the reader can scan the QR code and be directed to your website without the need to actually type in the URL. This is done by using apps installed on the device. Qrafter, for example, is a good one. I prefer RedLaser. Different scanning apps provide different benefits. I like RedLaser because it can scan many different types of codes, including UPC bar codes, which then checks online (and sometimes local) resellers for the lowest price.

Beyond performing a cool, vital function, they also serve as a way to legitimize certain printed materials. I recently created some tickets for a Boy Scout Troop’s Annual Pancake Breakfast Fundraiser. The QR code simply directed the user to the troop’s website, but the purchaser of the ticket would assume it was a unique barcode number. This would inhibit the duplication of tickets and reduce fraud.

QR codes can be used to perform many functions. For example:

Browse to a Website
Bookmark a Website
Make a Phone Call
Send an SMS
Send an E-Mail
Create a vCard
Create a meCard
Create a vCalendar Event
Google Maps
Bing Maps
Geographical Coordinates
iTunes App URL
iTunes App Review URL
Android Market Search
Foursquare Venue URL
Youtube URL for iOS
Encode Latest Tweet of a User
Tweet on Twitter
Twitter Profile Image Overlay
Create Blackberry Messenger User
WIFI Network for Android
Free Formatted Text

So, now that we know how to scan them, how do we create them? I personally like the generator created by Kerem Erkan. It allows you to export the QR code to many formats, my favorite being vector EPS. This allows me to open the QR code in Illustrator, easily adding it to the client’s artwork.

It’s important to note that all of the data required to perform the action is stored in the QR code itself. No third party website or service stores the code behavior or tells the smartphone what to do. The scanner reads the QR code, decrypts it, then performs the action.

By the way, the QR code at the top of this post actually works. Give it a try. You should be taken to the mobile version of this blog.

This has been today’s Clarified Butter.

Organize and archive your workflow

When I first started in graphic design, back before CD burners and cheap platter storage, we used 3.5″ floppy disks to store customer’s digital artwork. We had a rack on the wall that held several hundred disks, all labeled and marked with numbers. Those numbers correlated with a database stored on the computer which listed what each disk held. It was quite cumbersome, but really all that was affordably available at that time.

Over the years we moved to larger tape drives, zip drives, flash, and so on, until we eventually came to DVDs and hard drives. We’re at the point now where regular consumers can have terabytes of storage, locally or on their network. And at prices that are remarkably cheap.

I’m very picky in the way I organize my files. All of my personal projects have their own folder. Business files have their own folder. Current websites have their own folder, as does current design and current video project. All websites are organized by domain, and all design projects are organized by client name. Any web sites or clients that are considered ‘dormant’ are moved to ‘archive’ folders. These archived folders are then moved onto DVDs for permanent backup. I should also point out, during all of this time, all files on every computer on our network are backed up in three places (delta, every hour), automatically. So, if a drive or DVD were to go bad, we could always find a replacement somewhere.

Now, when it comes to naming your files, be specific. I had someone chuckle when I used the accent marks on résumé instead of just typing resume. I had to explain that résumé (that important piece of paper you provide with a job application) and resume (starting a process which had been paused) are different. If I wanted to search my computer to find a résumé, it would be much quicker as all instances of resume would be removed.

Also, if you don’t know which project a piece is attached to, ask! It’s better to be organized when they come back 2 years down the road and want to make a change to the flow chart for the XYZ project. If you had simply named it ‘flow_chart_32’, it’s going to be a lot more difficult to find. Store it in a folder named ‘XYZ’ inside the client’s folder. This might seem overly simplistic, but I’ve worked with individuals that were very sloppy, and stored practically everything on their desktop. I’m not saying that’s bad, but ProGravix doesn’t allow it.

This has been today’s Clarified Butter.

The end of an era

It was widespread news last night that Steve Jobs, former CEO of Apple, Inc. resigned after being on medical leave since January of this year. This comes after several other medical leaves, which included a bout with pancreatic cancer in 2004 and a liver transplant two years ago.

He had always said that his medical condition was personal. Certainly Wall Street did not like this, but I can understand his position. I’m saddened, however, that his ongoing poor health likely is what has caused him to step down. In his letter to Apple’s Board of Directors (and Apple community), Steve said:

“I have always said if there ever came a day when I could no longer meet my duties and expectations as Apple’s CEO, I would be the first to let you know. Unfortunately, that day has come.”

So, what exactly is causing him to not meet his duties and expectations? You’ve got to wonder that his health has deteriorated to a point where he is exhausted. With his positions that remain at Pixar and Disney, even the healthiest person would be spread thin. We’ve seen him lose massive amounts of weight over the years, becoming a frail man who could barely keep his jeans pulled up.

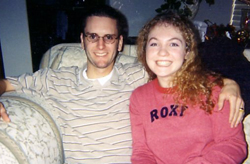
My Wife and I in December 2002, just prior to being diagnosed with Type 1 Diabetes

Having personally endured the onset of Type 1 diabetes, I can understand just how weak you can become. Over a six month period, I lost almost 100lbs before being admitted to the ICU, where as a six foot man, I weighed only 118lbs. Luckily, there were medications and devices available to treat my condition. Unfortunately for Steve, that doesn’t seem to be the case.

I hope that I am completely wrong. That we will see Steve continue his role as the public voice for Apple (seeing as how he remains as Chairman of the Board and Apple employee). My fear, however, is that Steve’s days are limited.

He is a truly revolutionary genius. I thank you Steve for what you have given. Not only to the Apple community, but to the entire world. Your extraordinary vision and leadership has proven to be a quality that many will fail to exceed.

This has been today’s Clarified Butter.

Mask like a BOSS

Image mask, applied to digital images to “cut-out” the background or other unwanted features, created by using clipping paths.

Thanks Wikipedia!

Now, why do we need to mask? Quite simply to make subjects appear cleaner or to use them on backgrounds for which they were not intended. I mask a lot of product photos. Often the background of these photos is not the best. Poor lighting, odd placement and other quirks lead to an useable photo. Luckily, we can mask all of that unwanted ugliness, and be left with an image perfect for an online store.

When I first started my career in graphic arts, I was trained in the techniques of paste up. That is, physically cutting and altering artwork to fit your needs. I guess it was needed for all of that old hardcopy artwork that was lying around that never made its way to the computer. Beyond becoming proficient with an X-Acto knife (to the point where I prefer it over scissors), I saw little to no benefit from it.

I guess it could be said that the training did benefit me in the skills of digital image masking. It’s not quite different… you just happen to be using a mouse instead of a knife and glue.

So how do I mask? I’m not sure how others do it, but I have a preferred method that produces remarkable results. With a mix of Photoshop and Illustrator, you can create masked images that dazzle your clients.

For the purposes of this tutorial, our desired result is a transparent background. This is beneficial in both online and print materials. If a client sends me artwork in high resolution, I will keep the image’s original size, and mask to transparent backgrounds. This saves me from having to re-mask if the client wants to use that image in future print materials.

Step 1: Get your image ready.
After receiving the image from the client, open it in Photoshop to verify resolution. If the image is high res, but set to 72dpi, set the resolution at 300dpi at the same pixel dimensions. Select the entire canvas and cut, then paste. This will create a new layer with your image. Delete the Background layer. Save your image as a Photoshop file with layers.

Step 2: Fire up Illustrator
Create a new Illustrator document that is larger than your image. Place your image onto the page. Set your zoom level to 300%, choose your path tool, and set the border and background colors to none.

Step 3: Create your clipping path
Using the path tool, outline the part of the image you want to keep. Make sure to stay very close to the edges of the piece you are masking, removing any shadows that might be present from bad lighting. After you have outlined all parts of the image you want to keep, set the fill the white with no stroke. Also create a small white box, with no stroke and align it at the top left corner. Select your paths and the small white box and copy that to the clipboard. Note: I have increased the transparency of the image to better show the clipping mask.

Step 4: Get back into Photoshop
Open the same Photoshop file (the one you placed into Illustrator) in Photoshop. Paste your clipping paths from Illustrator, creating a new layer. They will be pasted centered in the canvas area. Using the white box in the top left corner, move the layer so that the white outlines snap to that top left corner, perfectly covering what you want to keep.

Step 5: Select Inverse
Select and delete the white box in the top left corner, it has served its purpose. Select the entire canvas and hit your up then down arrow on the keyboard. This will make a selection of just the white areas. Choose Select > Inverse. Go to your Layers palette and choose the original image layer and hit the delete key. Choose the clipping path layer, and delete that layer. What you are left with is a perfectly masked image with a transparent background.

Now you can do whatever you want with that image. You can place it on a different background, collage it with other products, or apply image effects such as drop shadow. There is no limit to the possibilities.
So there you have it, what I consider the easiest, cleanest, fastest way to mask a product image.

This has been today’s Clarified Butter.

Color Correct Printing

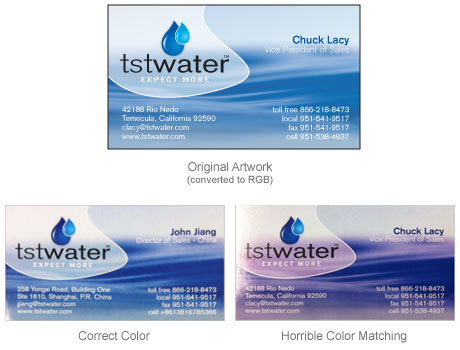
On two recent occasions I’ve had clients contact me with concerns they’ve had with the printing of artwork we’ve designed. In both cases, it’s been offset business card printing. The first client had been using a printer for years, successfully getting a brushed steel background to appear as a, well, brushed steel background, without the use of metallic ink. However, on a recent run, the background appeared more like a muddy green color. Certainly not what was expected, and nothing close to desirable.

After contacting the printshop, it was determined that they had changed their press since the last run. I had asked about color matching, and their response was pulled from their Terms & Conditions:

Color Proofing
Because of differences in equipment, paper, inks, and other conditions between color proofing and production pressroom operations, a “pleasing color” variation between color proofs and the completed job [as determined by generally accepted trade technical methods] is to be expected. When such a variation occurs, it will be considered acceptable performance.

The problem here is the phrase “pleasing color” that is considered “acceptable performance.” That is certainly up to interpretation. The good news, however, is that they have a 100% satisfaction guarantee. The client received all of their money back, including shipping, and took their job elsewhere.

With the other client, they had a background that appeared more purple on the newer cards, and color-accurate blue on the previous cards. Again, after contacting the printshop, they admitted that they too had changed their press.

This seems to be a widespread problem with these “online” printshop… offering incredible prices on business cards and other stationary items, with sometimes horrific results. Of course, true color accuracy could be achieved, but not by any of these more affordable printshops. Your best bet is to find a local printshop that will guarantee color correct printing. It’s going to cost you, but if having color accurate results is important to you, then it’s certain worth it.

This has been today’s Clarified Butter.

Don’t nickel-and-dime your clients

I’m not sure how else to say that. You’d think that the title of this post sums it all up, so I will do my best here at making a post of it.

We’re already super-fast when it comes to developing new ideas, or making changes, whether it be for web or print work. So, to say that our clients are really getting their money’s worth is an understatement. Regardless of whether clients are established, satisfied customers, or have just discovered us, we don’t start the clock rolling unless it’s substantial work. Certainly substantial can be open to interpretation, but as a general rule, if it’s going to take us less than 5 minutes to open your project and make a change, we don’t add that to your bill. To be honest, it’s probably easier for us not to add it to your bill for the sake of saving the time to actually add it to your bill.

We have clients that will send personal projects (or projects for their clients), such as photo touch ups, and ask that they personally be billed. As long as this is not substantial work (there is that word again), we won’t charge them.

So why do this? Well, it’s no skin off our teeth to make our clients happy, even if that comes at our expense. We want our clients (and potential clients) to be satisfied. Not only with our speed and prices, but also about our work ethic. We want to be there for our clients, so that they may know they can contact us for any needs they feel we specialize in. A lot of times, we get questions from clients wondering about a specific piece of software, or a service available online. We’re happy to provide advice. Advice that doesn’t cost you any extra.

I like to say, that if we are not designing, editing, or coding, the clock is not running. We never charge for discussions via email, or the occasional phone call. We never charge for back-end server changes (as long as they are using our preferred host).

ProGravix does not nickel-and-dime. I hate when it’s done to me, so I don’t do it to my customers.

This has been today’s Clarified Butter.

Aspect Ratios: Photo vs Video

A major part of creating custom video keepsakes for customers is manipulating their content, specifically their photos, video, and audio. Video can be tricky on it’s own, given the number of different formats. Music can come as cartridges, tapes, CD or digital copies. Today, however, I would like to discuss photos, which we receive in digital or physical form. About 80% of the time, they are physical, hard copies. Many videographers use video equipment to capture the photos, using small sections of film to create video clips. Instead, I prefer to actually scan the photos at an optimized resolution, which provides the best possible quality. And since they are now digital files, the customer can store them along with their newer digital photos (which we provide on the DVD-ROM).

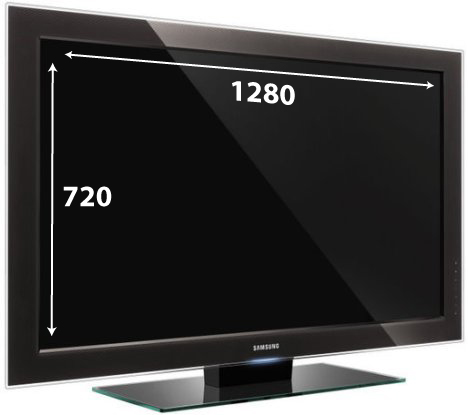
The point of this post is to discuss the resolution at which those photos should be scanned. When I ask customers to provide photos, which were originally digital, or prefer to scan themselves, I specify a size no smaller than 1280px at 72dpi (meaning that no side should be any smaller than 1280px). The reasoning here is that I am trying to optimize the photos for 720p HD resolution. But what does that mean? 720 refers to the number of lines of vertical pixels, while ‘p’ refers to Progressive Scan (something I won’t go into here).

So why 1280 if you want 720? Because most newer televisions, and ones that support at least 720p, have a wide aspect ratio (16:9), compared to older televisions that were more square with a 4:3 aspect ratio. If you had a 72dpi photo which was 720px high, to fully fill the 720p resolution, you would need a width of 1280px. Regardless of whether that photo is portrait or landscape, I want a width of no less than 1280px, and a height no less than 720px.

Given that the most common aspect ratio in still photography is 4:3, you will notice that a fair amount of your photographs will need to be adjusted to fit 16:9. I personally prefer to fill the entire screen, so I choose to enlarge, then crop the photos to fit. Most portrait photos will lose tops and bottoms, but with the use of panning and scanning (a la Ken Burns), we can dramatically present that photo, retaining most of the original photographers focus.

720p to 480p
Standard DVD resolution (read NOT Blu-Ray) is 480p. Yes, I understand that I am overshooting my resolution here, but given that I provide a digital copy with most videos, I might as well go all out (well, at least the lower levels of HD). I personally keep all of my home videos in digital format on an HTPC, so viewing HD content does not require Blu-Ray. I stream it directly from within my network. I envision that others might have this capability as well, and provide this digital copy with not much further effort.

This has been today’s Clarified Butter.

Beep. Beep. Beep. Back that thing up!

My sister recently contacted me with an issue she was having with her Early 2008 iMac. More likely than not, an issue you experience with a Mac is software-based. For my sister, however, her problem seemed very odd to me. She could use the computer for about 15 minutes, after which it would suddenly freeze, presenting a spinning beach ball.

At first, I tried using Disk Utility to verify the volume. Each check would say that the drive appeared to be okay. So, I assumed that something was wrong with the OS, given that it did take a long time to boot, and at times would present the dreaded folder with a question mark (an indication that a suitable system could not be found).

Next, I dropped in a Snow Leopard upgrade (since her iMac was running Leopard). I attempted to upgrade the OS, but it would constantly fail with 38 minutes left. And, not surprisingly, after about 15 minutes of use. Having no luck with a fresh OS install, I moved on to salvaging data. Now, mind you, my sister has no backup method whatsoever. All of her data, and most importantly, photos, all the way back from 2005 was no where but on that internal 250GB drive.

Target Disk Mode
Target Disk Mode is a method by which you can turn (almost) any Mac with a Firewire port into an external hard drive. To get the iMac into this mode, I connected the iMac to another Mac via Firewire. Next, I started up the iMac holding down the T key. Once you see the Firewire icon hovering on the screen, you are in Target Disk Mode, and the drive’s icon will mount on the desktop of your secondary Mac as a Firewire drive. This normally works great when all you have is a damaged system folder.

Unfortunately, this iMac’s problem wasn’t so easy a fix. I tried to salvage data for days, constantly hitting the 15 minute mark. This would cause the iMac to freeze and my secondary Mac (a Mac Pro) to seize as well. I had successfully retrieved all of the music, apps, books, personal documents, and all photos from 2005-2009. I couldn’t, regardless of my exhausted efforts, get any photos from 2010-2011.

The tear down
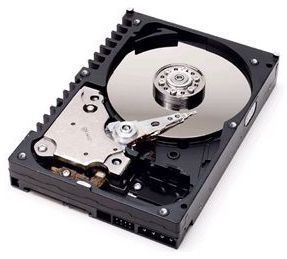
Now, I knew that something had to be physically wrong with the drive. I used an online guide and disassembled the iMac enough to get to the internal SATA drive. I pulled the old drive, and dropped in a new Seagate Barracuda SATA 500GB drive. I booted from the Snow Leopard DVD, installed the OS in a matter of minutes, and the computer was running like new!

The final recovery
Having two empty SATA trays in my Mac Pro, I installed the iMac’s SATA drive, started up, and the drive mounted on my desktop, but again, after 15 minutes, my entire computer would freeze. Only a hard reboot would bring it back up. I tried to grab those remaining photos from 2010-2011, but still, no luck. I shut down, pulled the drive out, and noticed that it was literally burning hot. I couldn’t even handle it. Now I knew for sure that something was wrong. After a little online guidance, I tried a last ditch effort. I dropped the SATA drive in a freezer bag and into a deep freezer for about 20 minutes. I pulled out the drive, installed it into my Mac Pro, rebooted, and it mounted right on the desktop. The drive performed as though it was brand new! Quickly I grabbed the remaining photos and copied them to my Mac Pro.

Restoration
I connected the iMac and Mac Pro via Firewire Target Disk Mode and copied all of the salvaged data (100% of it) back to the iMac. Finally, up and running again. My sister had her computer back the next day. Her husband said the computer was like “night and day”.

Insurance
My recommendation to her (and her husband) was to invest in an external drive for backup, utilizing Snow Leopard’s Time Machine feature. This is one of the methods I use, and it has certainly saved me more than a handful of times. I personally keep all of my data, up-to-date, in three separate locations. Two internal drives, and an external drive that is stored in a fireproof safe.

So, please be good people and backup. You’ll thank yourself some day.

This has been today’s Clarified Butter.

Content Providers: Be away with you

I used to think that I wanted a cable/satellite system that allowed me to subscribe only to the channels that I wanted, and not what the cable/satellite company included in a package. For years I paid the extra $15 a month to Dish Network to have FX included as part of the next-level-up package. Not to mention the extra $10 I had to fork over for HD, and $6 for DVR.

Yes, what I used to think. I am approaching the 1 year anniversary of canceling my Dish Network subscription, and I don’t miss it a bit. I don’t subscribe to cable or satellite television. I don’t subscribe to any entertainment, except for Netflix (which I am very happy to pay for). All of our content arrives via the internet or free over-the-air HDTV. Yes, we had a rather large initial investment in hardware, but what we enjoy now is a million times better than commercial ladened satellite or cable feed.

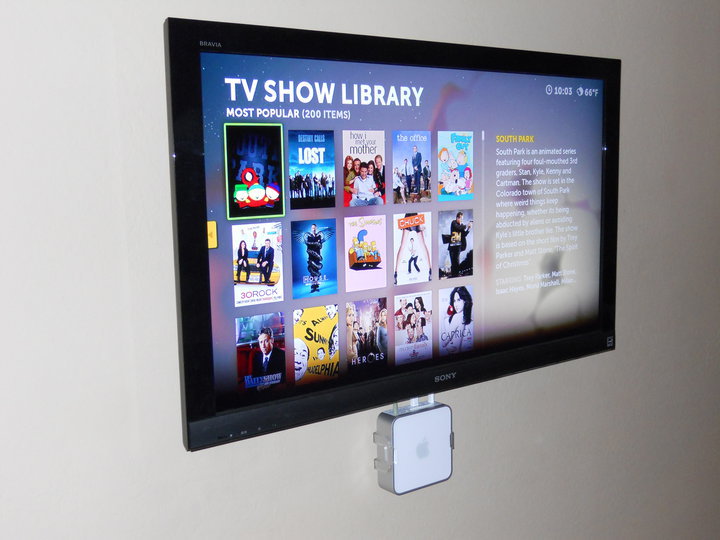
At the core of our entertainment system is a network of Macs running Snow Leopard and a myriad of applications. Each television is connected to a Mac Mini, and each store content that is accessible throughout the network. In addition to televisions, we have two iPod touches that also run apps that allow us to access our content locally, and remotely via the internet. We enjoy instant streaming of Netflix on all devices, free over-the-air high definition television, Hulu Desktop for when you really don’t know what you are in the mood for, and so much more.

I trust Plex
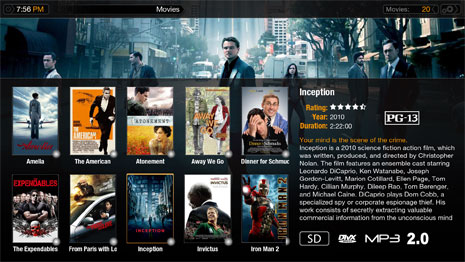
Before Plex/9 I made-do with Boxee. It seemed clunky, but it was really all there was in the 10-foot user interface arena. Plex is an application that runs on many platforms. I run it on Mac Minis, Mac Pros, and iPod touches. It aggregates all of my content that I have locally, and organizes them into movies, music, TV shows, etc. Within TV shows, it breaks it down into series, seasons, and episodes. It’s all controlled with a little Apple Remote. Viewing couldn’t be easier. I just pick the movie or show I want to watch, and it instantly displays on my HDTV, regardless of where it’s at on my network. And if I am right in the middle of a show, and I want to move to another TV or iPod touch, it remembers my place – across all devices.

Plex is free. You should give it a whirl: http://www.plexapp.com/

Netflix
I was really unsure about Netflix at first, but discovering TV shows that you missed from years past is really where it’s at. Sure, Netflix is known for their movies, but what’s available for instant-streaming certainly lacks. They seem to be working hard on that, but I think we watch way more television shows than movies on Netflix (especially the kids). Plex has an app that runs within its interface which accesses Netflix. It shows your online queue, allowing you to manage that list, you can browse movies and TV shows, and much more. It’s not perfect, but what can you expect for $8 a month.

Hulu Desktop
I hardly use Hulu Desktop, but it’s nice to have. It’s an application version of their website, and it’s available for many platforms. I mainly use it when I really don’t know what I want to watch. Sometimes I miss just clicking around the channels, and Hulu Desktop scratches that itch. Again, it’s not perfect, but hey, it’s free.

eyeTV
eyeTV is an application that allows us to watch free over-the-air HDTV through our Mac Mini. It provides DVR capabilities (to pause, rewind, fast forward, and record shows). It has basic editing controls that allow you to remove commercials, and when you are done, you can export your show and store it in Plex (or take it with you on your iPod touch).

To summerize
I think, for the most part, people are worried about using a computer as their entertainment system. They are afraid that they will be stuck with a keyboard and mouse on the couch. That’s really not the case. I think the only time I use a keyboard (wireless with a trackpad), is when I am editing shows that I recorded OTA, or when I want to use the HDTV to surf the web (the kids really like getting on Playhouse Disney with a 46″ screen).

If you have any questions about any HTPC (home theater personal computer) aspect, let me know. The more people I can move away from cable or satellite, the better I will feel.

This has been today’s Clarified Butter.