I’ve been part of the growing mass that has dropped their landline in favor of a mobile-only phone connection. I’ve been, officially, without a landline for six years. The seven years prior to that a landline was primarily used for fax and dial-up.
I’m hardly ever on my cell phone. I much prefer communicating via email. It provides all information I need in a readable form, that I can organize, and easily access if needed. There are times, however, when a phone call is required, and I’m sure we’ve all experienced those overage charges that can really cut into your profits.
So how do I alleviate my mobile overage problem? I make outbound calls on my iPod touch via a wifi connection. I’ve been doing this for a while, but have really been pushing it lately since my cell phone use has dramatically increased.
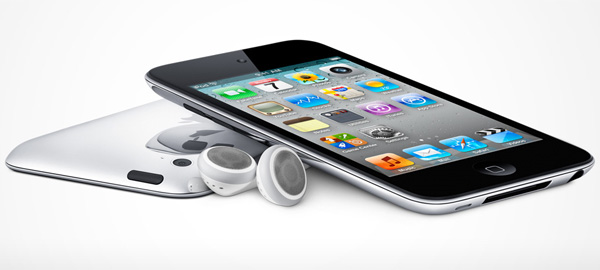
Here is what you’ll need to use your iPod touch as a phone:
- A Google Voice account (www.google.com/voice, free).
- Talkatone (www.talkatone.com, free).
- A set of earbuds with a built-in mic.
- A stable and fast wifi connection.
Google Voice
Before Google acquired this technology it was called GrandCentral. I had a GrandCental account, and was part of the invited group to move over to Google. In the beginnings of Google Voice you had to be invited to participate. Fortunately my invite came via the acquisition process.
To get a Google Voice account you will need a Google Account. For most, this means having a Gmail account, but you can have a Google Account and not use the Gmail service. I will say, however, that to fully utilize your iPod touch as a phone, you will need a Gmail account and Google Account. The reason is that we need to access Google chat, which is part of Gmail. I won’t go into the specifics here, as it seems fairly straight forward, but make sure you have both a Google Account (using the @gmail.com address) and a Gmail account.
When you first setup a Google Voice account you are asked to choose a phone number. You specify a city or area code, then they provide a list to choose from. Choose your number and setup your account.
Talkatone
Install Talkatone from the App Store. When you launch the Talkatone app the first time, you will be prompted to enter your Gmail email address and password. Make sure to use the Gmail account you used to setup Google Voice. Talkatone doesn’t require a special account. Instead it uses your Google Account to connect to Google services.
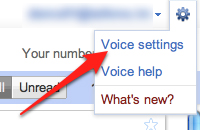 Login to your Google Voice account, go to Voice settings (access them via the little gear in the top right of the browser window). On the ‘Phones’ tab, check the box next to Google chat. Make sure to log out of all Google services, including Voice and Gmail.
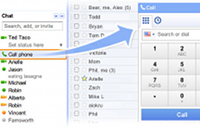 Now, go to www.gmail.com and login using the Google Account/Gmail account you used to signup for Google Voice. Find your contact list and click on the Call Phone action at the lower left section of the page. Make one call with the phone widget in GMail to your regular phone number. This step allows Talkatone to access the service, telling both Talkatone and Google that you’ve successfully setup Google Voice.
Finally, make sure to sign out of all Google services, including Voice, Gmail, and GTalk. If you don’t, calls made to your new Google Voice number will be forwarded to Gmail/GTalk and your iPod touch will not ring.
Come back to the Talkatone app and tap the ‘I did make a call from GMail web chat’. That way Talkatone will know that you successfully setup Google services.
You can now make and receive calls via Talkatone on your iPod Touch. Use the keypad to dial numbers direct, or use your Contact list. Get comfortable with Talkatone and visit the Settings tab. Make preferential selections for Notifications and Sounds.
And to clarify, you must have Talkatone open in order to receive calls. It’s not important that it be active, only that it be open and in suspended mode (aka multitasking). You can quietly keep it open while you use other apps on the device. When a call comes in, you will be notified (if you’ve setup your notifications as such).
I’d also like to say that while Talkatone supports SMS via Google Voice, I much prefer the Google Voice app for my texting. This didn’t use to be the case, but since Google Voice added landscape support, I’m sold on their app.
This has been today’s Clarified Butter.

 We’ve all seen them, and they’re becoming more heavily integrated into print with the prolific infiltration of smartphones and other mobile devices. But what is it, and how can it be used?